**Note: The content in this article is only for educational purposes and understanding of cybersecurity concepts. It should enable people and organizations to have a better grip on threats and know how to protect themselves against them. Please use this information responsibly.**
The dig command, which stands for Domain Information Groper, is a powerful DNS query tool found in Linux systems. This useful tool is crucial for network admins and IT professionals who need to work with DNS servers and check DNS-related info.
Key functions of dig include:
- Retrieving DNS records that link domain names to their IP addresses (both IPv4 and IPv6).
- Examine how DNS routing works and behaves.
- Diagnosing and resolving DNS-related issues.
What makes dig stand out from other DNS tools is how well it adapts to provide detailed info. This makes it useful to test DNS, fix problems, and take a close look at how DNS works.
Dig lets network admins fine-tune DNS queries. This level of detail helps them investigate and fix complex DNS issues.
Utilizing “dig” commands in Linux:
Type “dig -h” to get a list of options you can use with dig.

Getting information on a domain name
The command used for this will be “dig domain name”. In our case, we will use the domain testfire.net. Therefore, the command will turn out to be: –
dig domain_name

We can see here that the IP address of the entered domain name is obtained along with multiple other information.
If we only need the IP address, we can type the command: –
dig testfire.net +short

Using dig followed by the domain name gives us the “A records” by default.
This can be checked by searching for the A records. For this, type the command:
dig domain_name a

(We can see above that the results are the same as the command dig domain_name)
If we need the IPv6 address of a domain, we can obtain so by entering “AAAA” after the domain name. These are the AAAA records.

The AAAA records give the IPv6 address of the target domain.
Adding the +nocomments option excludes the comment lines.

To set or clear all display flags, use the option +noall

+answers option helps us view the answer section information in detail.

To get all DNS records together we can use the option ANY
3Getting the MX records of a domain
MX records or mail exchange records are the information of the mail server responsible for obtaining the emails on behalf of the domain. Details about MX records are stored in the authoritative nameserver.
To get the MX records, type the command:
dig testfire.net mx

Here, we can see that testfire.net has no MX records. If a domain does not have an MX record, mail will be sent to the A record that matches. So, for the domain testfire.net, as there are no MX records, the mail would be attempted to be delivered to the apex/root record of tesfire.net.
Let us find MX records for google.com. Type: –
dig google.com mx

Getting the NS records of a domain
These are the nameserver records. They identify the authoritative nameservers for a domain.
To get the NS records for google.com type:
dig google.com ns

Getting the TXT records of a domain
TXT or text records give human-readable or text information about domain names.
Type the command:
dig google.com txt

Getting the SOA records of a domain
SOA or State of Authority Records store admin information about a domain.
Type the command:
dig testfire.net soa

+short can be added to all the above commands to get only the records part:

With this, we got the SOA records for testfire.net.
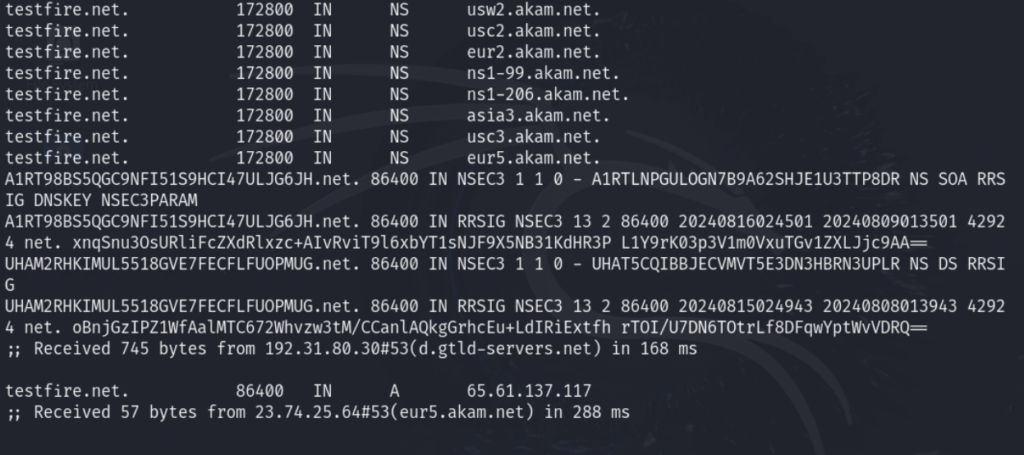
Tracing the DNS Lookup Path
The “+trace” command helps to investigate the step-by-step process of DNS name resolution. This option starts a series of back-and-forth queries that shows the whole lookup path for a domain name.
The process begins at the root of the DNS hierarchy and moves down the namespace tree in an orderly way. At each level, the command sends questions to the appropriate name servers following referrals to the next server in charge in the chain.
This iterative approach lets users see the whole process of a DNS lookup, giving them useful knowledge about how domain names are figured out across the internet’s distributed naming system. By following the path from the root servers to the final name server in charge, “+trace” gives a full picture of how DNS resolution works. This makes it a key tool for network administrators and DNS troubleshooters.


Performing Reverse DNS Lookup using Dig
Reverse DNS lookup figures out the domain name or hostname linked to a specific IP address. This method works backwards compared to a regular DNS lookup, which changes domain names into IP addresses.
-x option is used for this.


Performing DNS Zone Transfer Using Dig
DNS zone transfers that use the AXFR (Authoritative Transfer) protocol offer the easiest way to copy DNS records between DNS servers. This method allows you to edit information on a single server and then use AXFR to duplicate that information to other servers. This eliminates the need to make changes on multiple DNS servers. However, if you fail to secure your servers threat actors might exploit AXFR to gather details about all your hosts.
First, we find the authoritative nameservers of google.com

Now choose any nameserver and perform the zone transfer using axfr

We can see the command to perform DNS zone transfer above. However, the zone transfer failed because organizations generally disable it to avoid its misuse.
You can perform DNS zone transfer on an educational website where it is enabled. One such site is zonetransfer.me
Search for the nameservers of zonetransfer.me in a shorter output format by using the following command:

Now select a nameserver whose information you want to copy.
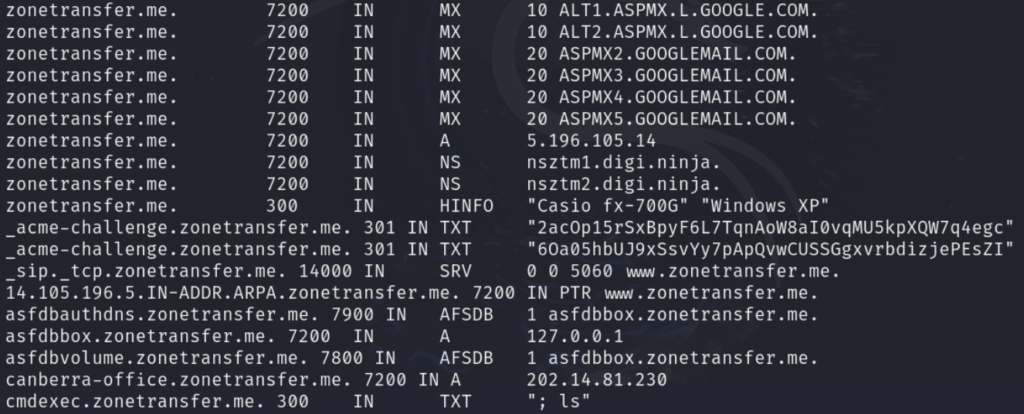
Type in the command below to perform zone transfer using AXFR query: –


So, we can see that we get the entire information about the primary nameserver and can replicate it to secondary nameserver.
We have now seen how to perform DNS footprinting with the dig command line utility.
Security experts who simulate attacks on DNS systems give companies key insights. Their work reveals potential weaknesses in DNS setups allowing firms to beef up their defenses before issues crop up. By showing how threat actors might abuse DNS records, these specialists help to set up better security measures and create detailed plans to handle incidents. This forward-thinking approach lets companies anticipate and cut down on DNS-related risks before they turn into real problems.


