**Note: The content in this article is only for educational purposes and understanding of cybersecurity concepts. It should enable people and organizations to have a better grip on threats and know how to protect themselves against them. Please use this information responsibly.**
Maltego is one of the most powerful information visualization and link analysis tools. It is used in cybersecurity for digital forensics and intelligence gathering. This versatile tool can aggregate and correlate extensive information from different online and offline sources, showing complex data relationships in an intuitive graphical form. Maltego is powerful in discovering hidden relationships and patterns among large data quantities. That is why it has become an essential tool for investigators, security professionals, and researchers. The capability to extend its functionality through user-developed or community-developed “transforms” makes the results of Maltego fine-tuned toward the needs of a particular user, extending its applicability to diverse investigation scenarios. In this article, we get an in-depth look into the key features of Maltego and its various use cases in information security. We will also go through a step-by-step walkthrough of how one can utilize Maltego.
After completing Maltego Installation and registering your account, you can run your first transform.
Maltego Transforms lets a user automate both the gathering and correlation of information from various sources. Transforms act as bridges between different types of data, providing an investigator with the capability to uncover hidden links and expand intelligence gathering. It enables users of Maltego to pivot quickly from one piece of information to another, building complex visual maps of interconnected data points across various domains like cybersecurity, forensics, and open-source intelligence.
After installation, you will get an option to start a guided investigation as shown below: –

Start it and follow the steps shown below:
We begin by selecting an entity, which is an IP address in this case.
Right-click on the IP address entity and select the ”All Transforms” option.
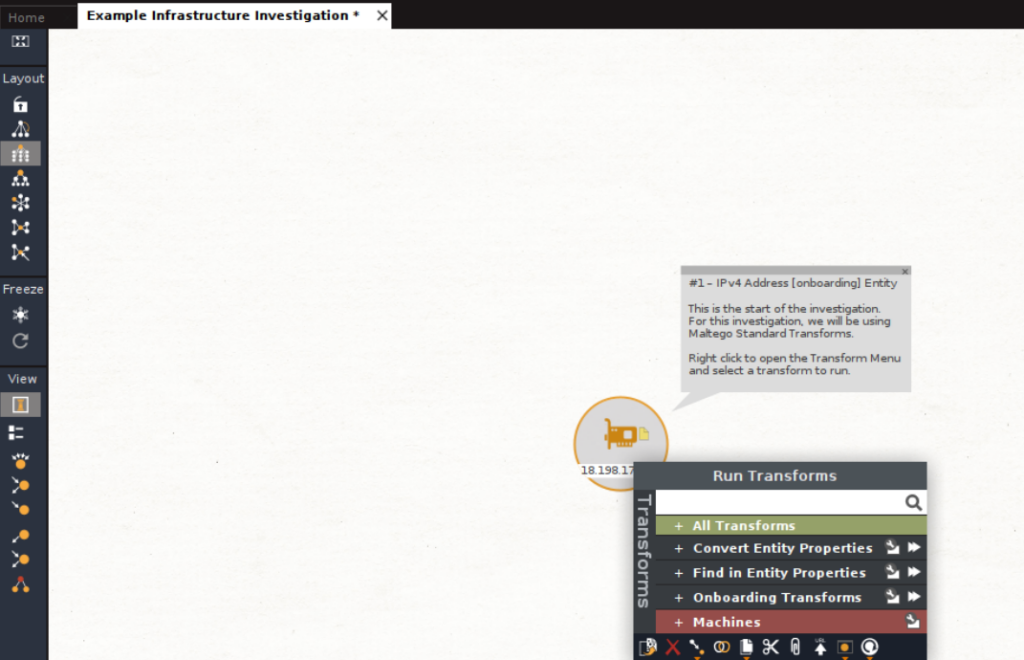
In “All Transforms” we see a list of various Maltego transforms.
We select “To DNSNames” to run this transform.
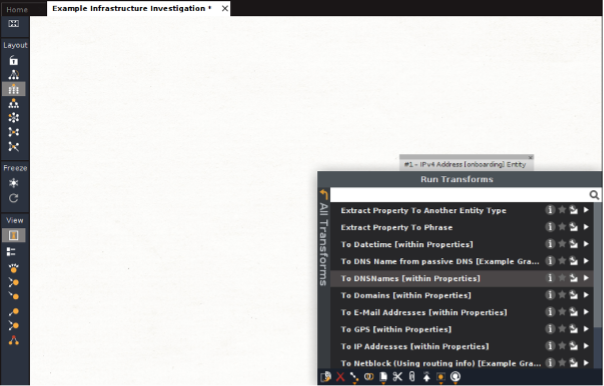
This particular transform tells us what the IP address has been used for.

To proceed further with the investigation, right click on the initial IP address entity and run the “To URLs” transform.

This gives us a range of IP addresses. Now right click on this range of IP addresses and select “To AS Number”.

This gives us autonomous systems linked with the IP address. An autonomous system is a collection of IP networks and routers under the control of a single organization which presents a common routing policy to the Internet. In other words, it’s a unit of the internet that manages and controls a set of IP addresses and performs routing between them.

So now we need to find the organization that is managing the autonomous system we have discovered.
For this, right click the autonomous system entity and select “To Company (Owner)”


We found that Amazon is managing the given IP address.
We have seen how impressive Maltego is. We could identify the organization behind an IP address with relative ease.
Running a New Transform
Click on “New” in the top left corner.

Now, select an entity you want to investigate.
Finding IP Addresses of Domain Names
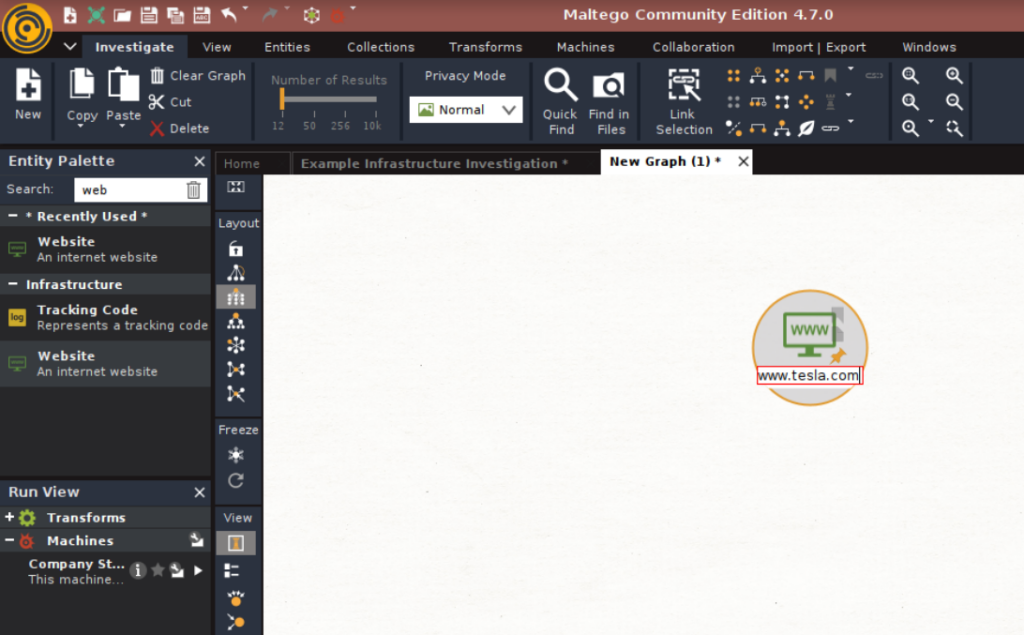
Here the entity we will select is a domain name or website. Search for “Website” in the entity palette.
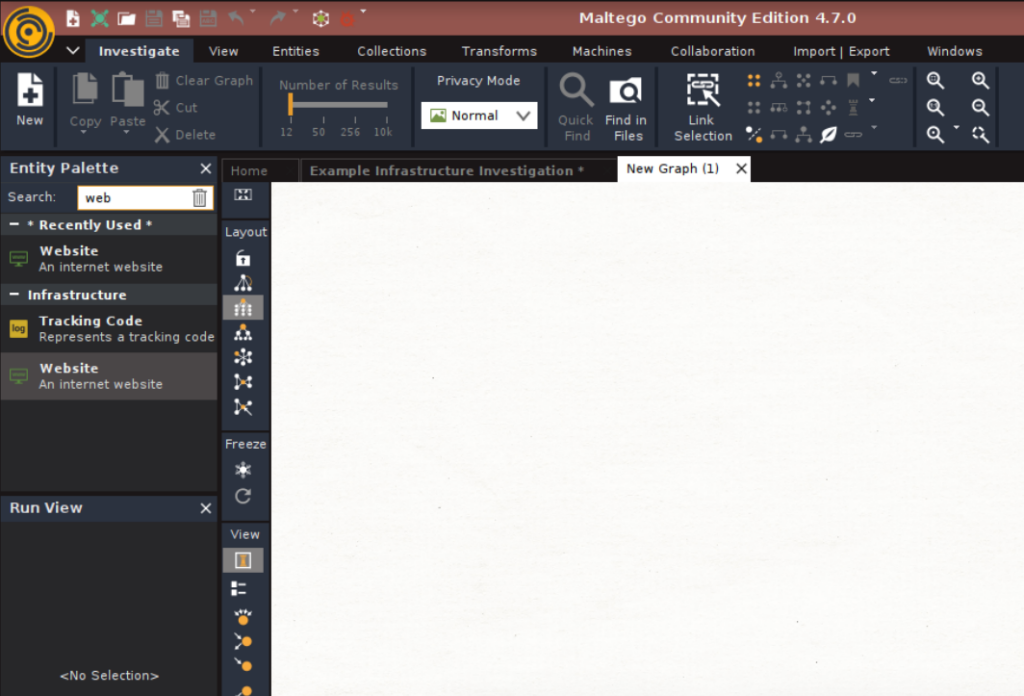
Drag the website entity on the graph sheet.
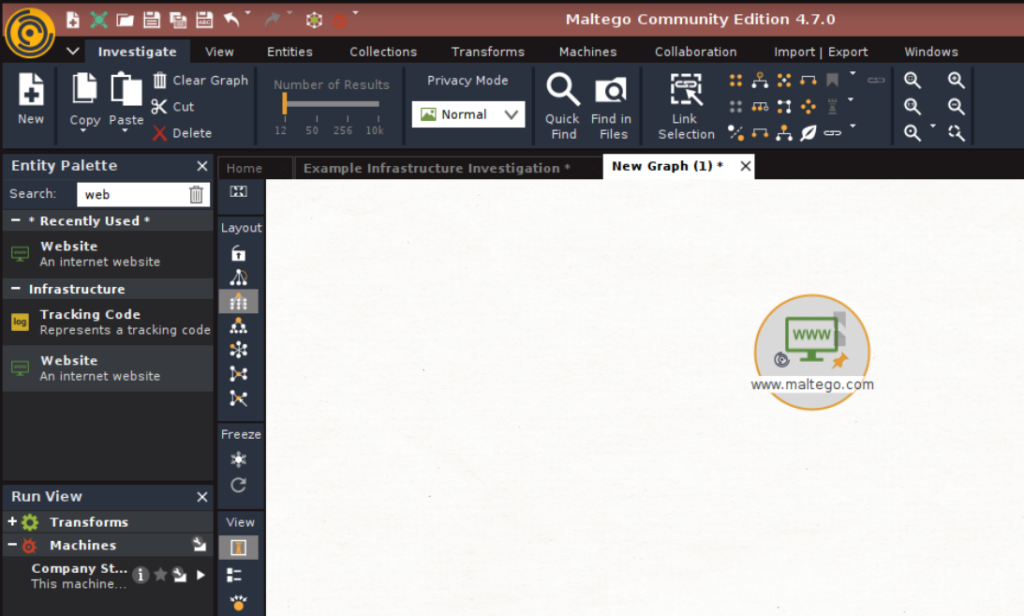
By default, the website name shown is www.maltego.com
Double-click on it and type the name of the website whose IP you want to investigate.
Now right-click the entity and click on “All Transforms.”
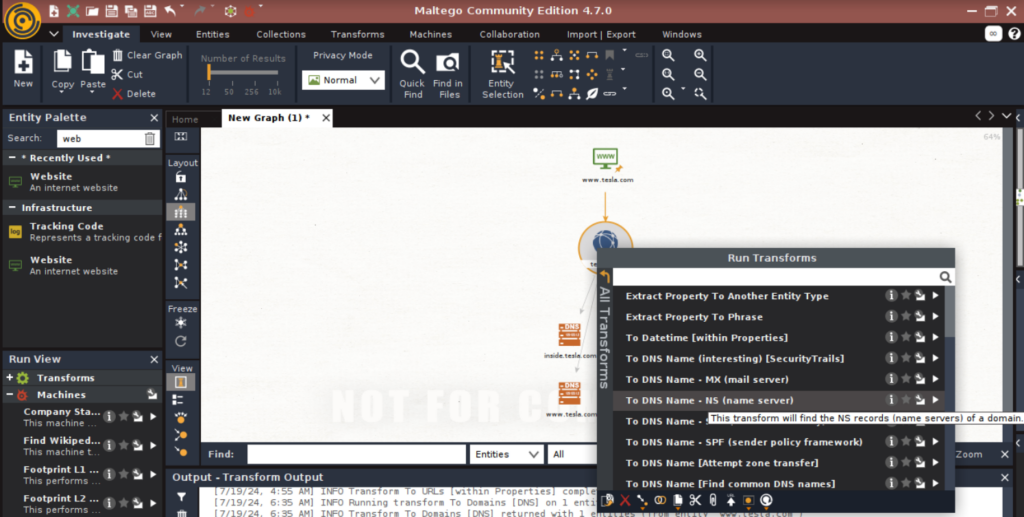
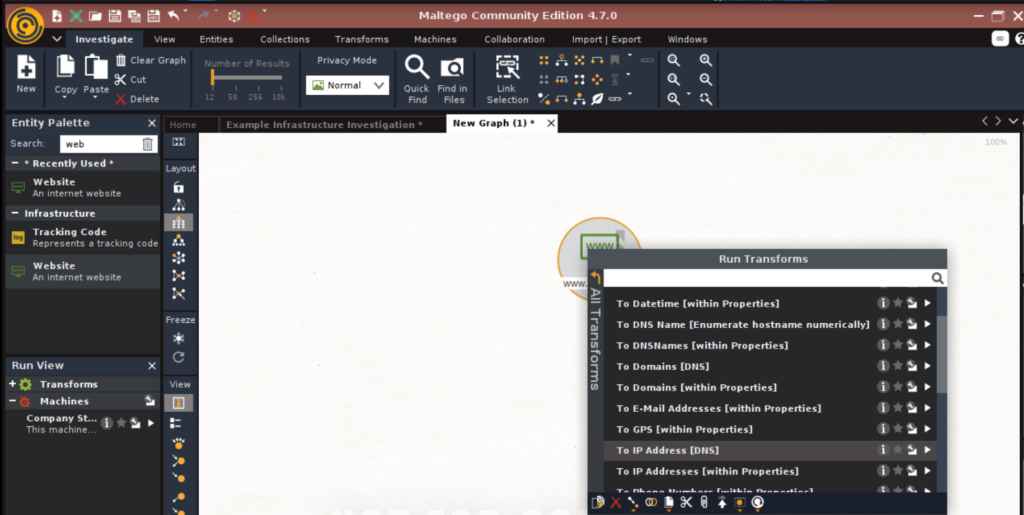
Select “To IP Address [DNS]”
This will display the IPv4 and IPv6 addresses corresponding to tesla.com
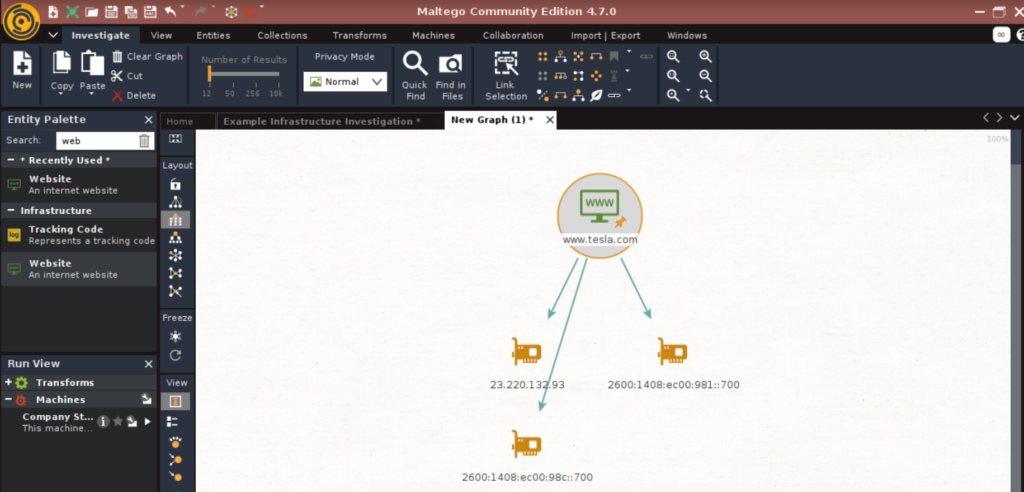
Gaining the IP Address is very important for an attacker. The attacker can use scanning techniques to scan the systems with the found IP address. With this, the attacker can find vulnerabilities and open ports in the system and, hence, attempt to infiltrate the network and exploit the systems.
Finding The Location of Servers from the IP Address
Right-click on the IP entity and select “To Location [City, Country]”
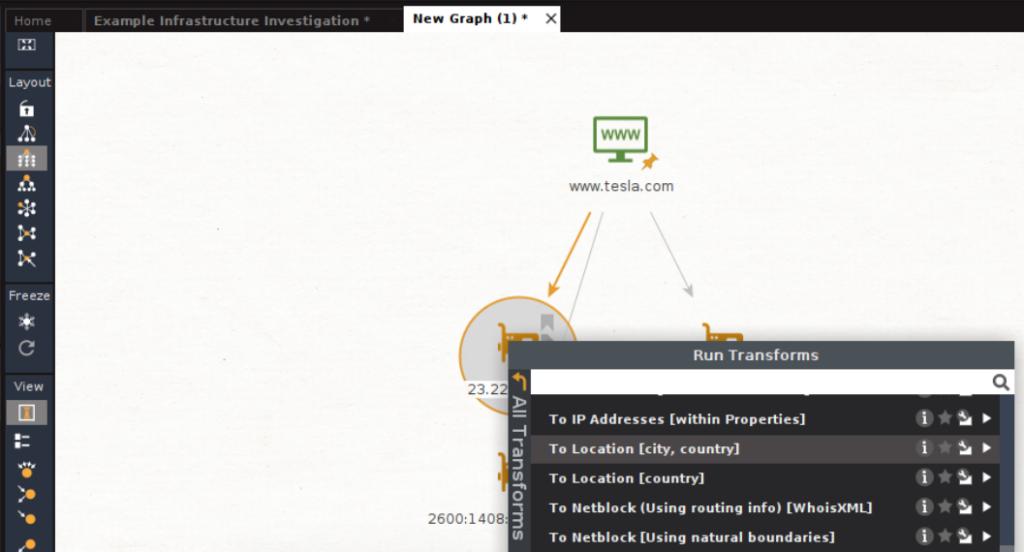
We can see that the servers are located in Ashburn, Virginia, USA.

By obtaining the geographical location of the servers, attackers can perform social engineering attacks and hence gain sensitive information about the target.
Getting DNS Information of a Domain
Right-click on the tesla.com entity and select “To Domains [DNS]”

The domains related to tesla.com are obtained.

Now, we can also obtain the WhoIs records of the domain. The WhoIs records tell us who owns the domain and how to get in contact with them.
To get the WhoIs information, right-click on the DNS name and select “To Entities from WhoIs”.
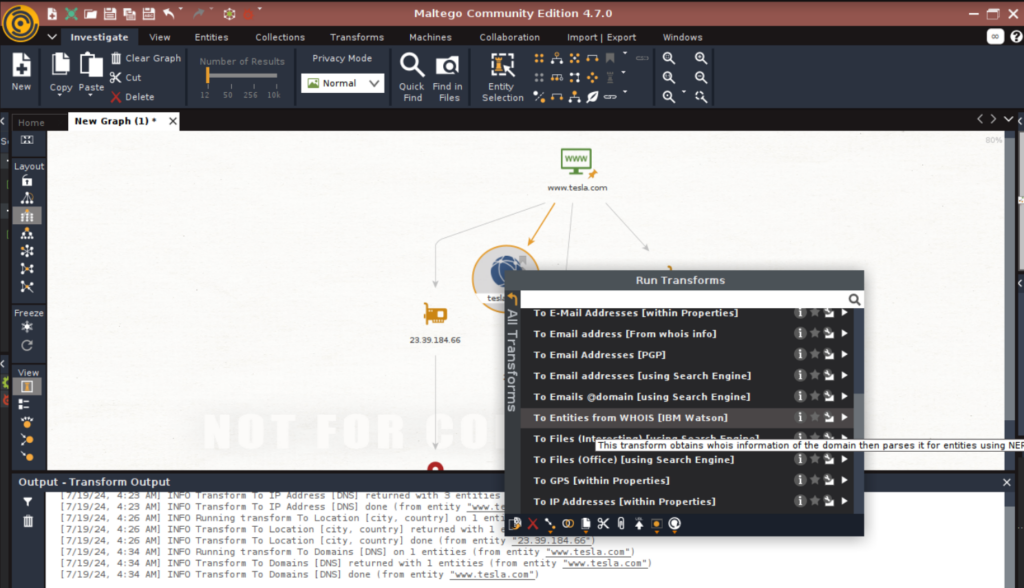
This will show the WhoIs information as shown below: –

With this WhoIs information, attackers can exploit the servers displayed in the result by performing brute force attacks on them and gaining unauthorized access.
If we zoom out on the graph, we can get a brief idea of what you have searched for as shown below: –
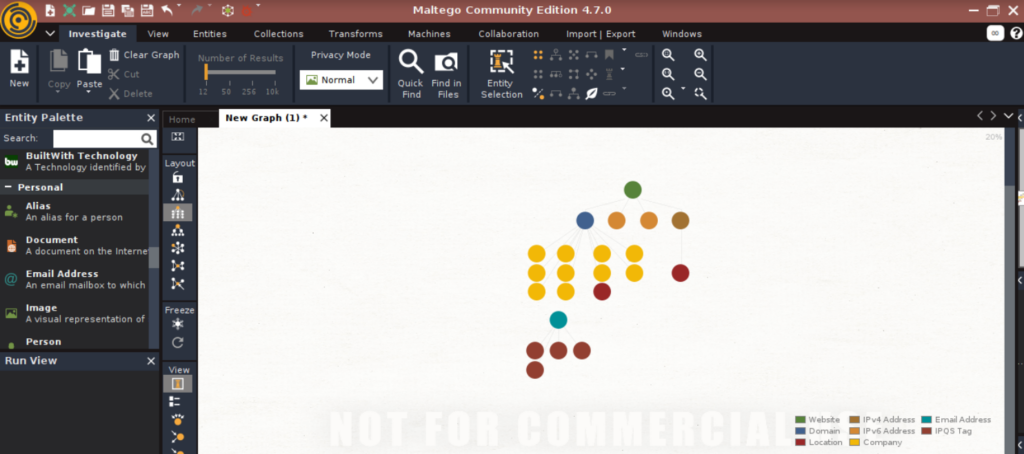
With this, you can easily see how the obtained information is related to each other. Also, all the information is available systematically in one place.
Obtaining Various DNS Records of a Domain
Create a new graph and drag the website entity onto it. Double tap on it and write the name of the website with the DNS records you want to investigate.
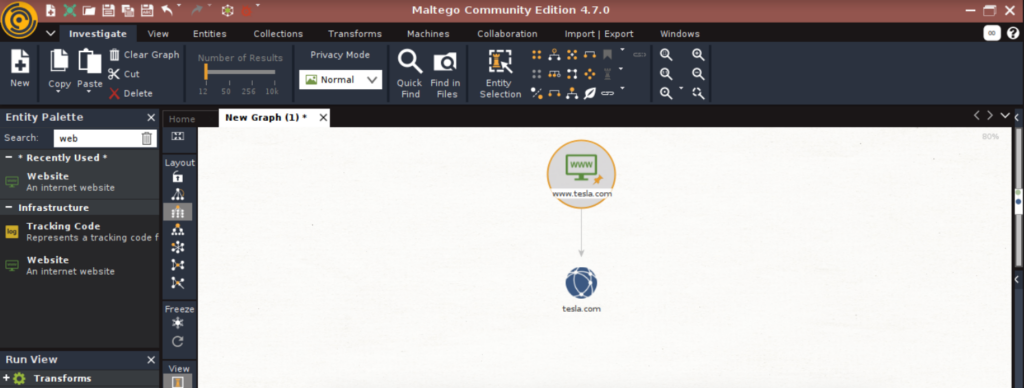
Right-click on the website entity and select “To Domains [DNS]”

Now, to get the name schema dictionaries, right click on domain tesla.com and select “To DNS Name [Using Name Schema Dictionary]”
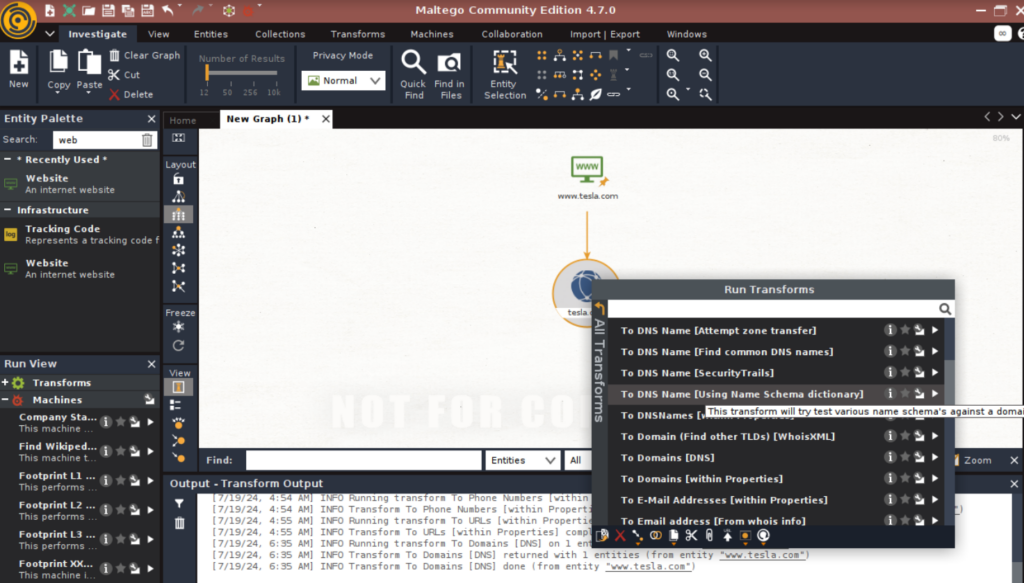
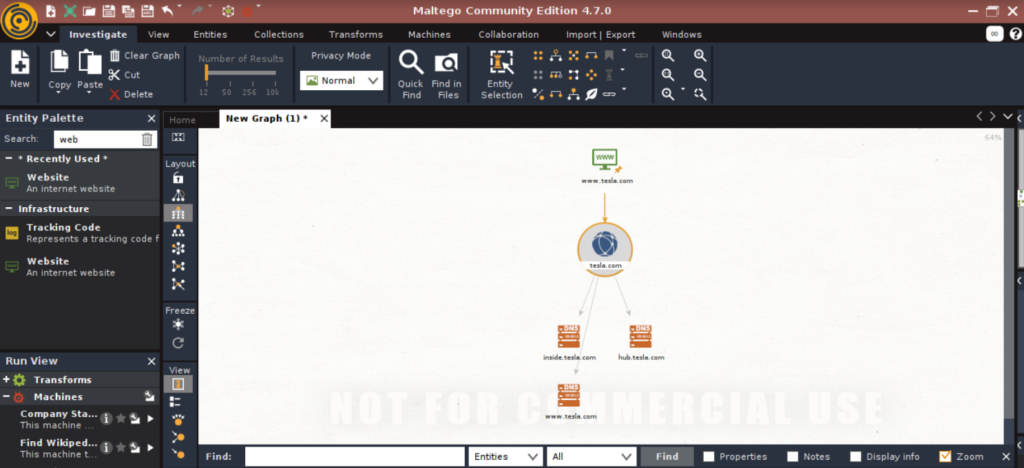
With this information obtained, the attacker now has more attack surfaces to infiltrate into the network.
Obtaining NS Records
Right-click on the domain entity and select “To DNS Name.NS [name server]”.

The NS records or nameserver information is obtained as shown: –
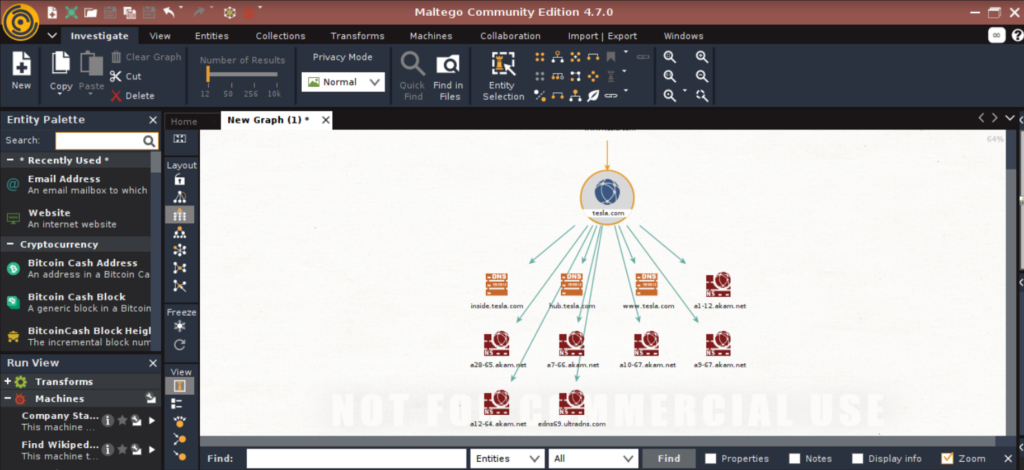
The NS records identify the authoritative nameservers for a domain.
By identifying this, the attacker can use various techniques to exploit the authoritative nameservers and perform malicious activities such as DNS hijacking, URL redirection etc.
Obtaining MX Records
Right-click on the Domain entity and select “To DNS Name.MX (mail server)”.
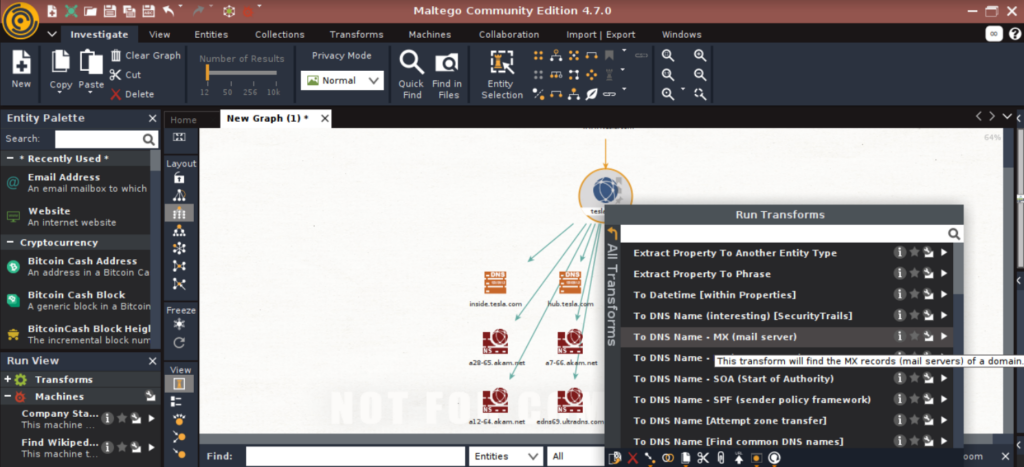
With this, we obtain the MX records as shown below (Highlighted): –

MX records or mail exchange records are the information of the mail server responsible for obtaining the emails on behalf of the domain.
We can see that tesla-com.mail.protection.outlook.com is the mail server for tesla.com.
By identifying the mail servers, the attacker can exploit the vulnerabilities present in it. The attacker can also send spam emails and perform denial of service attacks.
Obtaining SOA Records
Right-click on the domain entity and select “To DNS Name.SOA (Start of Authority)”
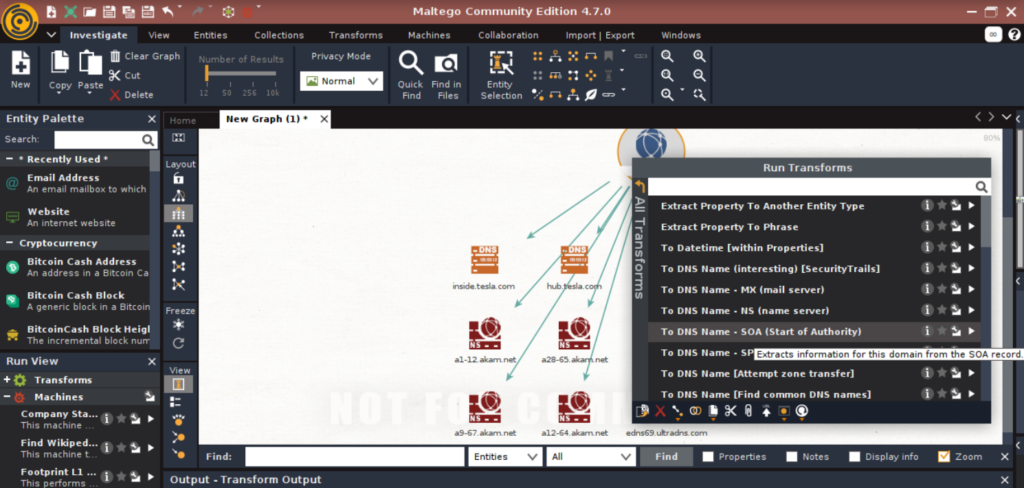
This will provide the SOA records as highlighted: –

SOA or Start of Authority Records store admin information about a domain (email and primary name server of the domain administrator).
Here, we can see that the email of the domain administrator is noc@teslamotors.com and the primary name server of the domain administrator is edns69.ultradns.com.
SOA records provide various attack surfaces for the attacker to exploit, and they can gain privileged access to the system by exploiting the vulnerabilities present.
Other Use Cases of Maltego
Maltego is a very powerful tool. So far, we have just scratched the surface. There are several use cases of Maltego such as: –
- OSINT Collection
- Social Media Analysis
- Deep and Dark Web Investigations
- Detecting Financial Fraud
- Disinformation Warfare
As we can see, Maltego is used by both attackers and defenders. The attackers gather intel to compromise networks, and the defenders safeguard the network’s systems.
We have thus covered the basics of an important utility in Maltego.


