**Note: The content in this article is only for educational purposes and understanding of cybersecurity concepts. It should enable people and organizations to have a better grip on threats and know how to protect themselves against them. Please use this information responsibly.**
What is Reconnaissance?
We know that reconnaissance is the first step of the Cyber Kill Chain in which an attacker tries to discover information about a target, such as an employee’s personal information or organization structure and infrastructure. It is notably the most important part of the cyber kill chain as it will dictate whether the rest of the phases will be successfully carried out.
There are two types of Reconnaissance:
- Active reconnaissance: When an attacker is directly interacting with the platform, which usually means the attacker’s activity ends up in a log of some sort. An example of this would be visiting the target website.
- Passive reconnaissance: It involves information gathering without interacting with the platform. This could include checking Google-cached websites or viewing articles about the company involved.
What is Splunk?
Splunk is a software-based tool used to search, monitor and analyze data by capturing the data and sorting it into events based on its source, time and date. We index the data in such a way that it is faster to search. One can say that Indexer is Splunk’s core. Indexed data can be filtered and searched using the Splunk search bar and Search Processing Language (SPL). Splunk can also actively monitor system performance and health in real time.
Investigating using Splunk
In this article, let us imagine an attacker is performing an active recon at the organization. This means that the attacker’s traffic must have been recorded in the central Splunk instance.
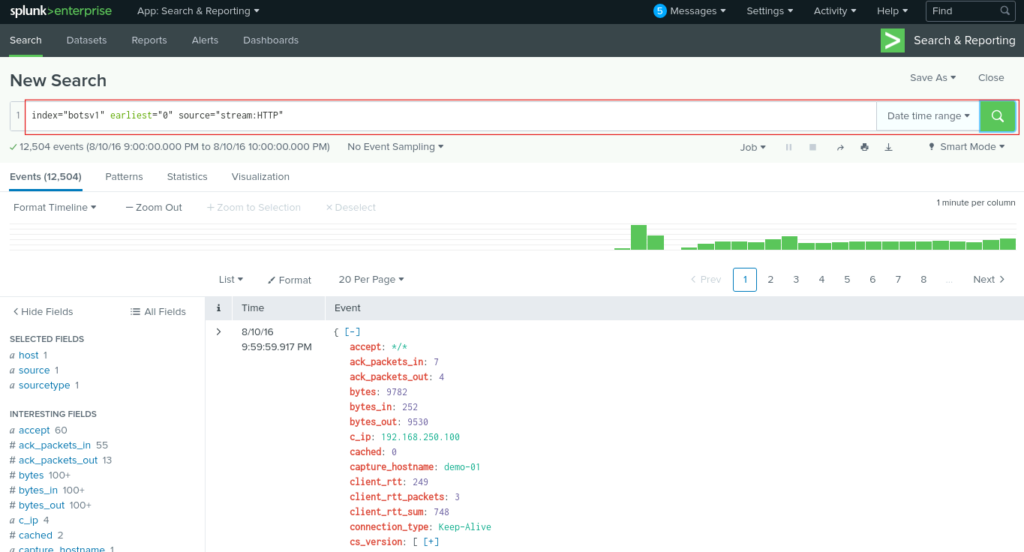
- First, we will filter the relevant logs using the Splunk search query:
index=”botsv1″ earliest=”0″ source=”stream:HTTP”
- index=”botsv1″: This specifies the index where the data is stored. botsv1 is the name of the index, likely containing data related to a specific dataset.
- earliest=”0″: This specifies the time range for the search.
- source=”stream:HTTP“: This specifies the source of the data within the index.

- Second, we will try to search what domain the attacker is trying to target. We can look into the site field and find the domain that appears to have the most amount of traffic suggesting it could be the main focus of the attack.
Domain attacker is targeting: imreallynotbatman.com

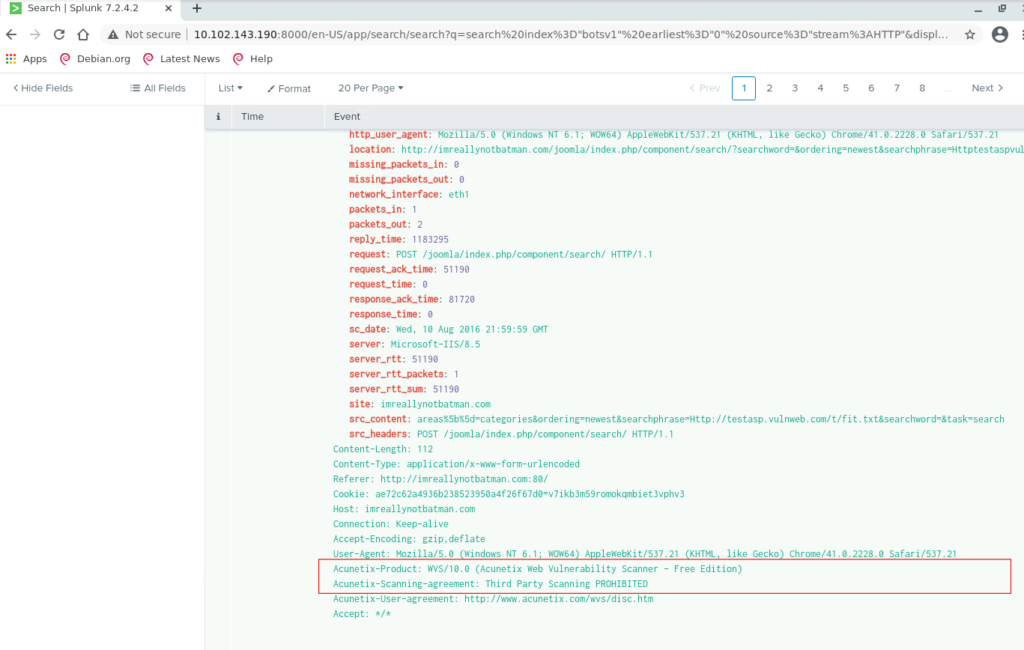
- If you look into some of the events, you will find an Acunetix-product header which tells us an attacker is performing active recon using a vulnerability scanner.
Acunetix-Product: WVS/10.0 (Acunetix Web Vulnerability Scanner – Free Edition)
This header explicitly mentions the Acunetix Web Vulnerability Scanner, identifying the tool and the version (10.0) used.

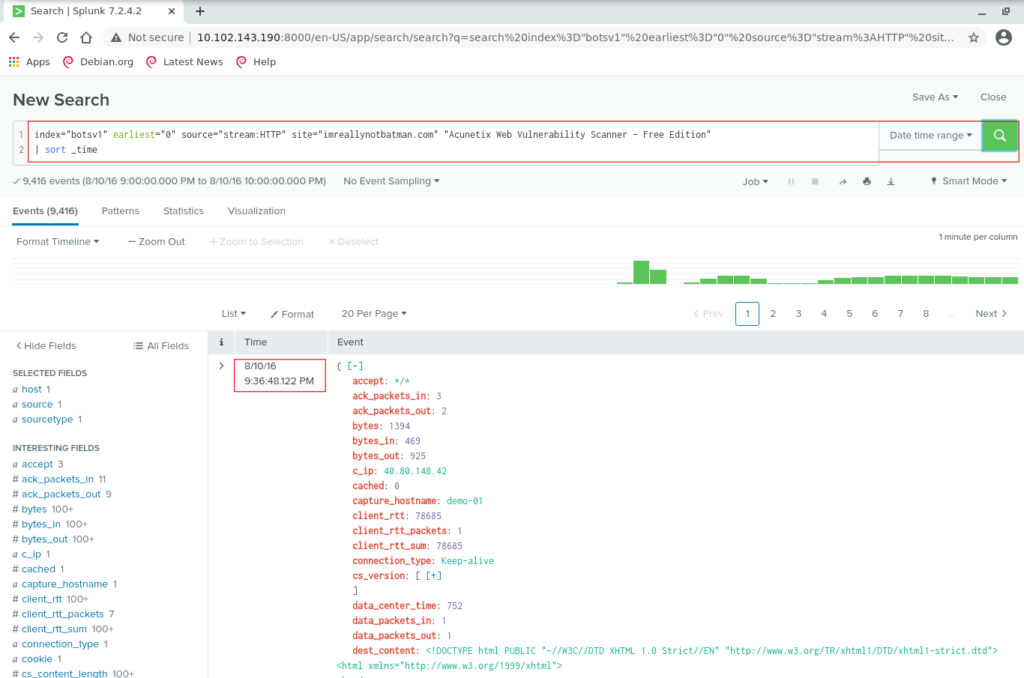
- Lastly, we will try to find out when the attacker first started conducting their reconnaissance efforts. For this, we will modify our query into the search bar by adding the site, vulnerability scanner name and sort option:
index=”botsv1″ earliest=”0″ source=”stream:HTTP” site=”imreallynotbatman.com” “Acunetix Web Vulnerability Scanner – Free Edition”
| sort _time
- site=”imreallynotbatman.com”: This filters the results to only include traffic associated with the domain imreallynotbatman.com.
- “Acunetix Web Vulnerability Scanner – Free Edition”: This string searches for events containing this specific phrase, which is likely found in the User-Agent or other headers, identifying the use of the Acunetix scanner.
- | sort _time: This sorts the results by the _time field in ascending order, showing the earliest events first.
Now, if we look into our first event in the log, we will find the first-time attacker started recon on 8/10/16 at timestamp 9:36:48.122 PM.

After analyzing, we can block the attacker’s IP address. If recon led to any compromise, we must isolate the affected system from the network to prevent further exploitation. We should also set up alerts in Splunk for any suspicious activity from the attacker or similar patterns of behaviour.
Caught feelings for cybersecurity? It’s okay, it happens. Follow us on LinkedIn and Instagram to keep the spark alive.


